If you are not familiar with how you can properly set featured image size in your wordpress site, then this article is for you. Continue reading until the end and by the time you are finish reading this article, you will be able to properly set featured image sizes in your wordpress blog the right way without running into any kind of strange cropping issues.
When I say strange cropping issues, what I mean is like the one below:
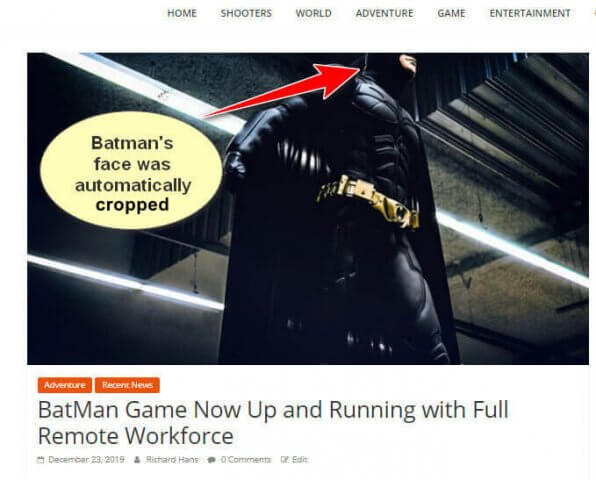
As what is shown above, you don’t want that to happen to your website right? But sometimes or many times, this kind of unexpected mistake is always seen in many other wordpress sites or blogs.
Though this kind of mistake could not affect your onpage seo nor could it affect your search engine ranking, but it gives unpleasant experiences on the part of our website users or visitors. Remember, not all people are alike. Each one of us has different taste, likes and dislikes based on our first impression of anything we see.
Some people will judge your whole website based on their first impression on the page they see upon reaching to it even without first reading the whole content of it. So, no matter how good or important you are writing about, if your visitors first impression on your site is different, then they will definitely leave your site right away and find some other sites that will not turn them off.
But right now, consider that this kind of strange cropping issue is already resolved after reading and following the whole steps and I’m showing below.
But before anything else, do not forget to always back up your wordpress site. Whatever changes you are going to make in your wordpress site, no matter how big or small they are, always be on the safe side.
Correctly Set Featured Image Size In WordPress The Way It Should Be.
Steps To Follow To Set Correct Featured Image Size
1. Choose The Right Featured Image Size Proportionately
To correctly set featured image size for your wordpress site’s blog posts, you need first to decide what size of the featured image in terms of height and width you want to be visible in each of the thumbnails or in the blog posts of you website.
Choosing the right featured image size in terms of its height and width is very easy. And our choice of its proportional height and width of the featured image will become our basis in correctly setting the best featured image for our wordpress site’s blog post.
So, just to give you and example, one of my wordpress websites has a featured image size of 800 by 445px. This is just an example but your could be different. but even if yours could be different, you can still follow this guide. But if you want to know the ideal featured image size, it is 1200 by 628px.
But even after knowing the best and ideal featured image size for your wordpress blog, still you may encounter strange cropping issues. The reason for this is that you yourself need to set your wordpress site thumbnail size to the desired featured image aspect ratio that you choose. Like for example: if you choose the size of 800 by 445px to be your featured image size, then the thumbnail size should be in proportion to the aspect ratio of 800 by 445px.
In order not to be confused follow the next step
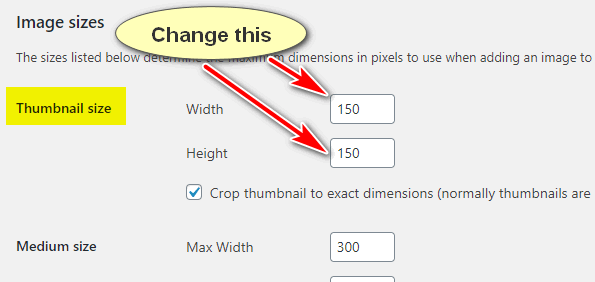
2. Change WordPress Thumbnail Size According To The Aspect Ratio of The Featured Image Size
Earlier, I mentioned that in some of my websites I use 800 by 445px as featured image size. So, because of this, let’s take 800 by 445px as the based featured image size in this example.
Now to avoid strange cropping issue, what we need to do next is to change wordpress thumbnail size based on the aspect ratio of 800 by 445px.
To do this, following the steps below:
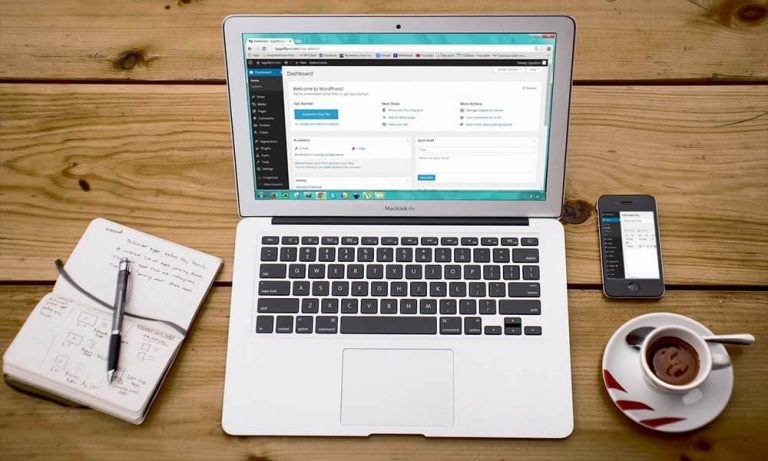
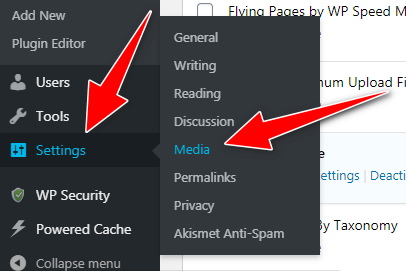
- Login to your wordpress dashboard and go to the setting on the left panel and click on media. See below image:
- Change thumbnail size based on the dimension and aspect ratio of 800 by 445px
To give you an exact example, since we chose 800 by 445px to be our featured image size in this example, then our choices that we can use to implement in our thumbnail size are the following size given below based on the aspect ratio of 800 by 445.
- 700 by 389px
- 600 by 334px
- 500 by 278px
- 400 by 223px
- 300 by 167px
All of the given sizes above can be used to be added as a thumbnail size in wordpress if your main featured image size of your wordpress blog is 800 by 445px. All the sizes I mentioned above is based on the aspect ratio of 800 by 445px.
So, if the featured image size you use is different, then you only need to follow it’s proportional aspect ratio when adding size specification in wordpress thumbnail size. By doing this you can avoid strange cropping issue like many newbie bloggers have experienced.
In the example above I started my example with the size of 700 by 389px since that’s smaller than 800 by 445px which is the main featured image size I chose and ended with 300 by 167px. For me, I will not go below 300px because that;s too small for me. But if you want smaller than 300 you can do it so, as long as you still follow the rule. And the rule for this is to follow the aspect ratio of the main featured image size.
By following all the steps above, you will surely avoid strange cropping issues as long as you always use a featured image size of 800 by 445px or whatever size you chose in following the step given in here. Your blog posts’ featured image sizes and the thumbnail sizes of your blog post lists will show image sizes proportionate to the size of your main featured image without any cropping issue.
3. Always Use The Desired Featured Image Size You Chose
After making changes to your wordpress thumbnail size, the main featured image size you chose will be the one that you should always use as the new featured image size when adding new posts to your wordpress blog.
In my example, since I use 800 by 445px as the featured image size in one of my website, then I will continue using this featured image size on that particular site to avoid cropping issues.
Please take note that whatever featured image size you already have been using and after implementing the tutorial guide shown in here, you should not change your featured image size again when you upload or add new post to your blog to avoid cropping issues.
4. Clear the Cache Versions Of Your Pages And Posts
Don’t forget to clear cache versions of your posts and pages. It’s really better to do it so. What ever cache plugins you are using, use it to clear your website cache. When clearing cache, don’t forget as well to clear the cache version saved in your CDN service that you are using.
Conclusion:
My final word is that after you followed and implemented my example above, the changes will only take effect in the following new posts that you will be adding in your wordpress blog.
Sad to say, if you follow the steps above, the changes will not take effect on your old blog posts with featured image that you already have right before you follow this tutorial. The reason for this is that because, your old blog posts have their own defined featured image sizes that you implemented before.
The only solution to this is to use another wordpress plugin that will automatically resize your old featured images and thumbnail sizes according to the new size dimensions you implemented.
I hope you found this article helpful. And if you did, please consider showing this with your friends in social media.