Renaming WordPress Media Files Is Important
If you want your website to be easily searchable in google or in many major search engines in the world, you need to make sure that every image in your wordpress website is given with the right names. What I mean is you need to make sure all the images or media files inside your wordpress site should have meaningful file names.
By giving your website images with meaningful file names, you help google and the rest of the search engines find your website easily. This also helps your website to get a good ranking in major search engines in the long run.
But the only problem is that, it’s really time consuming to go to your webhosting cpanel just to find specific media files to rename them. Luckily, there is a solution to this.
How to Rename Existing Media Files in WordPress
In this article, you will learn how to rename wordpress media files the easiest way without the need of going to your webhosting cpanel. Even your oldest media files can also be renamed using this technique. In this tutorial we are going to use some popular but effective media file renamer plugins that we can find in wordpress repository.
Steps To Follow For Quickly Renaming Media Files
For you to start renaming your new and old media files in your wordpress site just follow some simples’ steps given below:
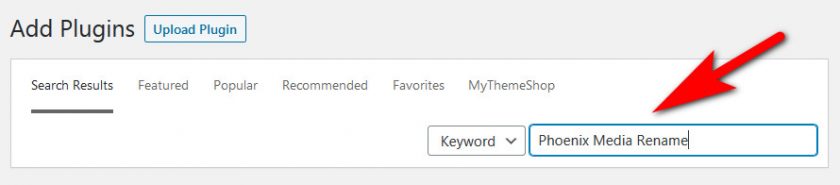
- In your wordpress admin dashboard, just click on plugin menu and click add new.
- In the search plugin box, just type in the wordpress plugin name “Phoenix Media Rename”. The best way to rename the existing media files in your wordpress site, without the need of going to your website’s cpanel is by using plugin.
- Once your find the plugin, just go ahead and install it. Once installed, click activate.
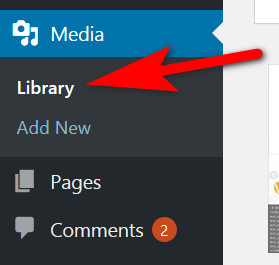
- After installing and activating the wordpress plugin, go to media library section by clicking the library under media menu you can find on the left side of your wordpress dashboard.
- Change the media library appearance from grid style to list style.
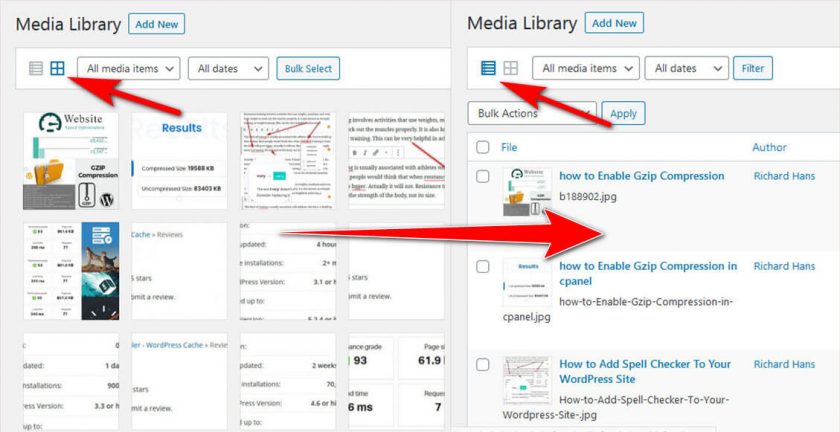
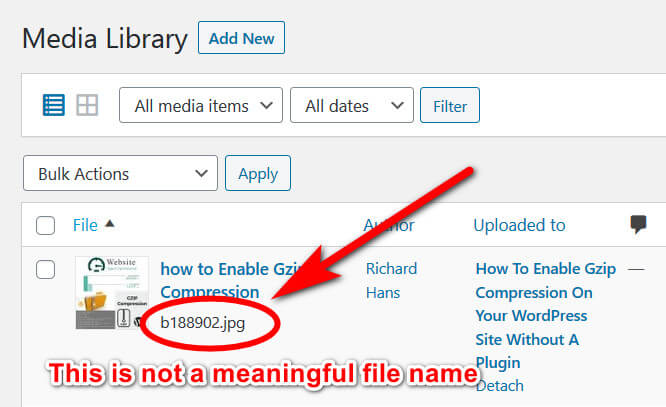
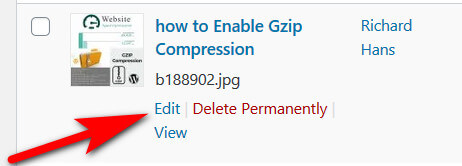
- Make sure to do the step 5 first so that the option to edit the media file name will become available. The next thing to do is to find the media files with names you want to change just like the example below:
- Once you find the media files with names to be changed, just click on EDIT.
- Scroll down at the bottom where you can find the filename box which has the existing file name of the media file that you want to change.
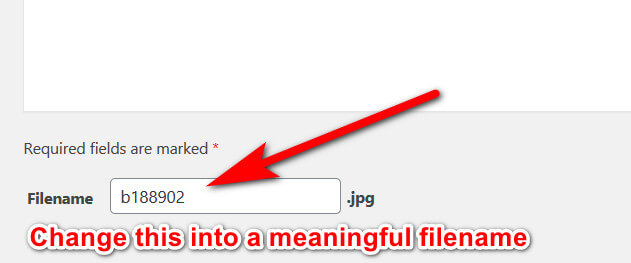
- In the filename box, just remove the existing file name and type in a meaningful name of your choice. In naming a media file, make sure to write out some meaningful or descriptive name that will be useful for search engines or users to help them understand what the image or media file is all about. Make sure to use hyphen in naming your media files. Do not use spaces in between words.
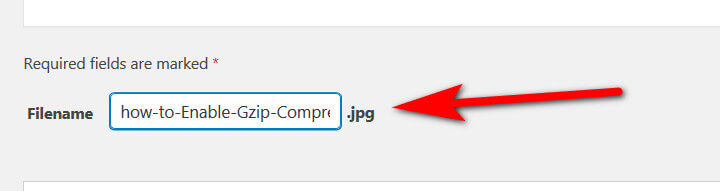
- Once you are done naming the media file with a descriptive or meaningful name, you can now click on update button. After you update your media file with new name on it, your wordpress pages or post that uses the media file in question would also be updated with the new filename. This means the link of this media file would be updated with new link that contains its new descriptive filename.
That’s how easy it is for you to rename existing media files or photos in your wordpress sites. So, if you think you wordpress site is full of media files that have non-descriptive or unmeaningful names, it’s time for you to start implementing what you have learned in here.
Bonus Tip:
Rename your Media files Automatically Using Media File Renamer
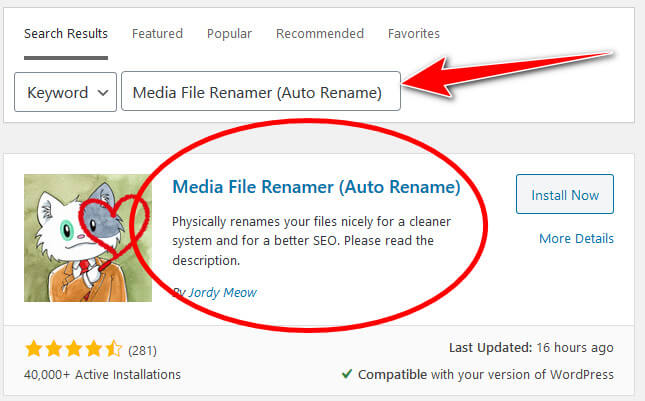
If you want to checkout this plugin, just to wordpress.org and search for the plugin name Media File Renamer (Auto Rename) By Jordy Meow
Now, if you think that what you’ve learned in the discussion above is not enough and you want an even faster way of renaming your media files, then this bonus tip is for you. Just read and follow the steps below:
- Same old step, go to your wordpress admin area and proceed to the plugin section where you can add new plugin.
- Search for the plugin name “Media File Renamer (Auto Rename)” by Jordy Meow.
- Install and activate the plugin.
- Once activated, go to your media library and make sure that the list style is activated when displaying your media files in media library:
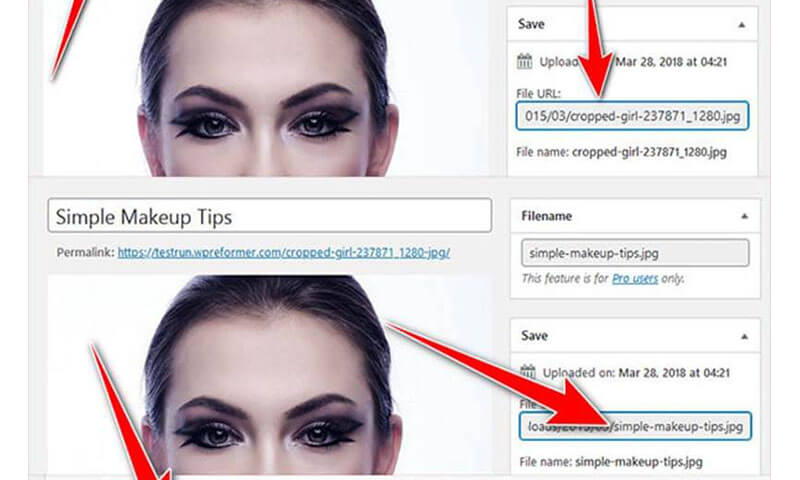
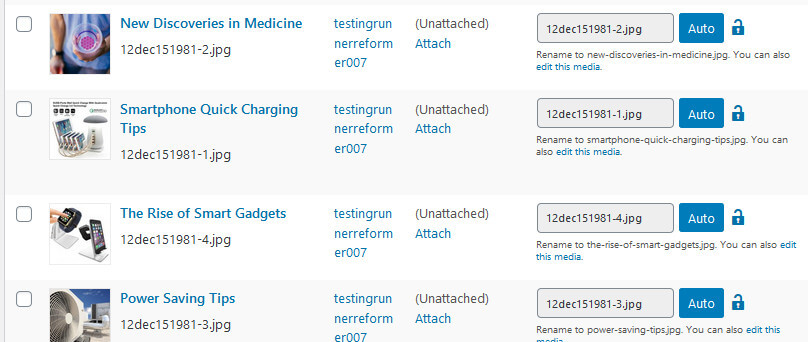
- In the media library with list style activated, you will see new features for you to be able to automatically rename your media files based on the title of the image you assigned to them. Look at my example below:
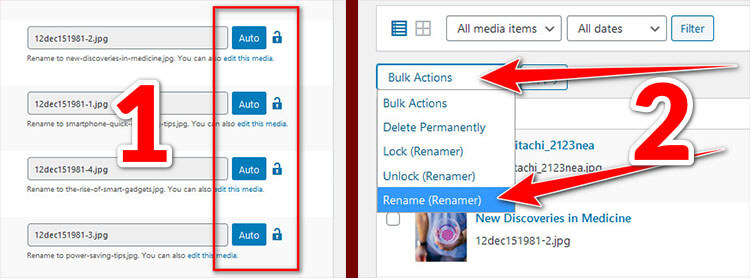
- By using this plugin, there are two ways for you to rename your media files. The first one is by clicking the auto button. The second one is by choosing “Rename (Renamer)” under “Bulk Actions” and clicking apply button just like the images shown below:
- After you click the auto button or apply the renamer under bulk actions, then whatever name you assigned to each image will become its filename as well.
Another good feature this plugin has is that if you are going to edit any images on your media file and change their names manually, their filename will also be changed with the new one that you use as your name for the images.
This only means that if you change the name of your image when editing it, the filename of it will also be changed. The new image filename will become the same as the name of the image you assigned to it.
See Example Below:

That’s how easy and simple it is for you to be able to change or rename media files in your wordpress site. Changing names of your website’s media filename is very important. It helps major search engine find your website on the internet and, at the same time, it helps you boost your ranking on the web.
But for those who know much better ways of renaming media file names than what is shown in here, please consider sharing your ideas by leaving some valuable comment below.