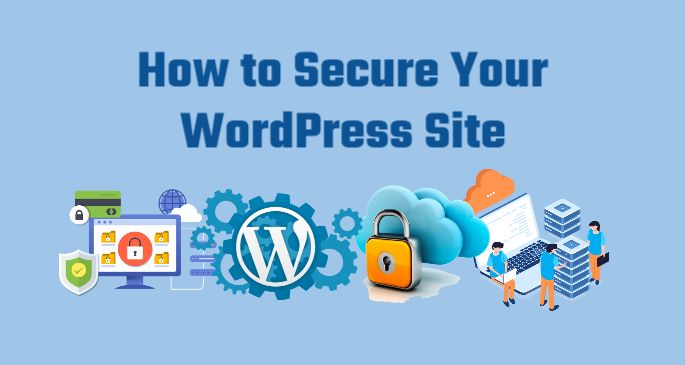
WordPress is a popular and powerful platform for creating websites and blogs. However, like any online platform, it’s vulnerable to various security threats. One effective way to enhance the security of your WordPress site is by using the .htaccess file. In this article, we’ll explore ten essential WordPress .htaccess security tips for WordPress. Each section will cover one tip in detail, providing you with a comprehensive guide to fortifying your website’s defenses.
I. Understanding the .htaccess File
In this first article of our series on WordPress .htaccess security tips, we will dive deep into understanding the .htaccess file. This is the foundation upon which we will build a more secure WordPress website. By the end of this article, you’ll have a clear grasp of what the .htaccess file is, where to find it, and how to access and edit it.
What is the htaccess File?
The .htaccess file is a configuration file used on web servers. It stands for “Hypertext Access” and is a powerful tool for configuring and customizing how web servers, such as Apache, handle requests and access to specific directories. In the context of WordPress, the .htaccess file is crucial for enhancing security and controlling various aspects of your website.
Where to Find the .htaccess File
The .htaccess file is typically found in the root directory of your WordPress installation. To access it, you’ll need to connect to your server using either an FTP client or a file manager provided by your web hosting control panel. Once you’ve connected to your server, navigate to the root directory, and you should see the .htaccess file.
How to Access and Edit the .htaccess File
Accessing and editing the .htaccess file is a straightforward process. Here’s a step-by-step guide:
- Connect to Your Server: Use an FTP client like FileZilla or your web hosting control panel’s file manager to connect to your server.
- Locate the .htaccess File: Navigate to the root directory of your WordPress installation to find the .htaccess file.
- Backup the .htaccess File: Before making any changes, it’s essential to create a backup of the .htaccess file. This ensures that you can restore it if anything goes wrong during the editing process.
- Edit the .htaccess File: You can edit the .htaccess file using a text editor. Open the file, and you’ll see a list of directives, each with a specific function. To add or modify rules, you can follow the syntax provided in various security tips articles.
- Save and Upload: After making changes, save the .htaccess file and upload it back to the server. Overwrite the existing file if prompted.
- Test Your Website: To ensure that the changes haven’t caused any issues, visit your website and navigate through different pages and functionalities. If everything works as expected, you’ve successfully edited your .htaccess file.
Understanding the structure and syntax of .htaccess rules is essential for making specific security enhancements, which we will cover in subsequent articles. The .htaccess file gives you fine-grained control over your WordPress site’s behavior, including security measures to protect it from potential threats.
Stay tuned for the next section, where we will explore how to disable directory listing, another critical step in fortifying your WordPress website’s security.
II. Disabling Directory Listing in WordPress Using .htaccess
In our previous article, we discussed the importance of understanding the .htaccess file and how to access and edit it. Now, in the second installment of our WordPress .htaccess security tips series, we will focus on disabling directory listing using .htaccess. This step is vital in preventing hackers from accessing sensitive files on your website.
What Is Directory Listing?
Directory listing, also known as directory browsing or indexing, is a feature that web servers offer by default. When a directory on your website doesn’t contain an index file (e.g., index.html or index.php), the server displays a list of all files and folders within that directory. While this can be convenient for site administrators, it’s a potential security risk when it’s available to the public.
Hackers often use directory listing to explore the structure of a website, identifying potential vulnerabilities and files they can exploit. Disabling directory listing through your .htaccess file is a crucial security measure.
Disabling Directory Listing via .htaccess
Here’s how you can disable directory listing for your WordPress site using the .htaccess file:
- Access Your .htaccess File: As explained in the first article, connect to your server and locate the .htaccess file in the root directory of your WordPress installation.
- Backup the .htaccess File: Before making any changes, create a backup of the .htaccess file to ensure you can restore it if necessary.
- Edit the .htaccess File: Open the .htaccess file with a text editor and add the following lines of code:mathematicaCopy code
Options -IndexesThis code instructs the server to disable directory listing for all directories in your website. - Save and Upload: Save the .htaccess file and upload it back to the server, overwriting the existing file.
- Test Your Website: Visit your website and try accessing a directory that doesn’t have an index file. You should see an error message instead of a directory listing.
By following these steps, you’ve successfully disabled directory listing for your WordPress site, making it more secure. Hackers won’t be able to see the contents of your directories, which is a significant step in safeguarding your website.
In the next section, we will explore another crucial security tip: preventing hotlinking using the .htaccess file. This helps protect your website’s resources from being used by other websites without your permission.
III. Preventing Hotlinking with .htaccess in WordPress

Welcome to the third article in our series on WordPress .htaccess security tips. In this installment, we’ll focus on preventing hotlinking using the .htaccess file. Hotlinking, also known as inline linking or leeching, occurs when other websites use your site’s resources, such as images or videos, without your permission. This not only consumes your bandwidth but can also result in content theft. Preventing hotlinking is a crucial security measure for your WordPress site.
What Is Hotlinking?
Hotlinking is the act of directly embedding or linking to files on your website, such as images, videos, or other media, from another website. When this happens, the other website benefits from your resources without hosting or storing the content themselves. This can lead to several issues, including:
- Bandwidth Theft: Hotlinking consumes your website’s bandwidth, potentially causing slow loading times and increased hosting costs.
- Content Theft: Your content can be used by others without your consent, which may harm your website’s SEO and reputation.
- Image Replacement: In some cases, hotlinkers may replace your images with inappropriate or malicious content, which can damage your brand.
Preventing Hotlinking via .htaccess
Here’s how you can prevent hotlinking using the .htaccess file in WordPress:
- Access Your .htaccess File: Connect to your server and locate the .htaccess file in the root directory of your WordPress site.
- Backup the .htaccess File: Create a backup of the .htaccess file before making any changes.
- Edit the .htaccess File: Open the .htaccess file with a text editor and add the following lines of code:
# Prevent hotlinking of images
RewriteEngine on
RewriteCond %{HTTP_REFERER} !^$
RewriteCond %{HTTP_REFERER} !^http(s)?://(www\.)?yourwebsite.com [NC]
RewriteCond %{HTTP_REFERER} !^http(s)?://(www\.)?google.com [NC]
RewriteRule \.(jpg|jpeg|png|gif)$ - [NC,F,L]
Replace yourwebsite.com with your actual domain. You can also add or modify domains in the list to specify which sites are allowed to hotlink your images.
- Save and Upload: Save the .htaccess file and upload it back to your server, replacing the existing file.
- Test Your Website: To confirm that hotlinking prevention is working, try to access an image on your site directly from another website. It should result in an error.
By following these steps, you’ve effectively prevented hotlinking on your WordPress site. Your website’s resources are now better protected from unauthorized use, which helps maintain your site’s performance and integrity.
In the next section, we will delve into blocking IP addresses using the .htaccess file, another essential security measure to protect your WordPress website.
IV. Blocking IP Addresses with .htaccess in WordPress

In this article, we’ll explore the important practice of blocking specific IP addresses using the .htaccess file to enhance the security of your WordPress website. Blocking IP addresses is a proactive measure to safeguard your site from potential threats and malicious users.
Why Block IP Addresses?
There are several reasons to block IP addresses on your WordPress site:
- Malicious Users: Some individuals or bots may repeatedly attempt to access your site with malicious intent, such as attempting to break into your admin area or launching DDoS attacks. Blocking their IP addresses can thwart their efforts.
- Spammers: IP blocking can help reduce comment spam and contact form abuse by preventing known spammy IP addresses from accessing your site.
- Geographic Restrictions: If your website is intended for a specific audience or region, you can block IP addresses from outside that region to enhance security and focus your resources.
Blocking IP Addresses via .htaccess
Here’s how you can block specific IP addresses or ranges using the .htaccess file:
- Access Your .htaccess File: Connect to your server, locate the .htaccess file in the root directory, and create a backup.
- Edit the .htaccess File: Open the .htaccess file with a text editor and add the following lines of code:
# Block a single IP address
order allow,deny
deny from 123.45.67.89
allow from all
Replace 123.45.67.89 with the IP address you want to block. If you want to block a range of IP addresses, you can use the following code:
# Block a range of IP addresses
order allow,deny
deny from 123.45.67.0/24
allow from all
In this example, we’re blocking the entire range of IP addresses from 123.45.67.0 to 123.45.67.255.
- Save and Upload: Save the .htaccess file and upload it back to your server, replacing the existing file.
- Test the Block: To verify that the IP blocking is working, you can try accessing your site from the blocked IP address. You should receive an error message and be unable to access your site.
Remember that it’s important to use IP blocking judiciously, as blocking legitimate users can have unintended consequences. Always make sure you’re blocking the correct IP addresses.
In the next section, we’ll discuss enforcing strong passwords using the .htaccess file, an effective measure to enhance your WordPress site’s security.
V. Enforcing Strong Passwords in WordPress with .htaccess
Welcome to the fifth article in our WordPress .htaccess security tips series. In this installment, we’ll focus on enforcing strong passwords for your WordPress site using the .htaccess file. Weak passwords are a common security vulnerability, and ensuring that your users choose strong passwords is essential to protect your website.
The Importance of Strong Passwords
Weak passwords are a significant security risk. When users choose easily guessable passwords, it becomes relatively simple for attackers to gain unauthorized access to your WordPress site. This can lead to various security breaches, data loss, and reputational damage. By enforcing strong passwords, you add a robust layer of security to your site.
Enforcing Strong Passwords via .htaccess
Here’s how you can enforce strong passwords for your WordPress users using the .htaccess file:
- Access Your .htaccess File: Connect to your server, locate the .htaccess file in the root directory, and create a backup.
- Edit the .htaccess File: Open the .htaccess file with a text editor and add the following lines of code:
# Enforce strong passwords
ErrorDocument 401 "Access Denied"
ErrorDocument 403 "Access Denied"
<FilesMatch "wp-login.php">
AuthName "Authentication Required"
AuthType Basic
AuthUserFile /dev/null
require valid-user
</FilesMatch>
These lines of code essentially require authentication for accessing the wp-login.php file, which is the primary login page for WordPress. Users will be prompted to enter a valid username and password to access the login page.
- Save and Upload: Save the .htaccess file and upload it back to your server, replacing the existing file.
- Test the Enforced Passwords: Try accessing the wp-login.php page to confirm that users are prompted to enter valid login credentials.
By implementing this .htaccess rule, you’ve made it significantly more challenging for attackers to gain unauthorized access to your WordPress site. Users will need to use strong, secure passwords to log in, which enhances the overall security of your website.
In the next section, we’ll discuss how to restrict access to the wp-admin directory, another critical step in protecting your WordPress site from unauthorized login attempts and other security threats.
VI. Restricting Access to the wp-admin Directory with .htaccess
In this sixth article of our WordPress .htaccess security tips series, we’ll delve into the practice of restricting access to the wp-admin directory using the .htaccess file. The wp-admin directory is a prime target for hackers, and limiting access to it is an effective way to enhance the security of your WordPress site.
The Significance of Restricting wp-admin Access
The wp-admin directory contains sensitive files and functionalities related to the administration of your WordPress site. Allowing unauthorized access to this area can lead to various security threats, including unauthorized login attempts, brute force attacks, and potential data breaches. Restricting access to the wp-admin directory is an essential security measure.
Restricting Access to wp-admin via .htaccess
Here’s how you can restrict access to the wp-admin directory using the .htaccess file:
- Access Your .htaccess File: Connect to your server, locate the .htaccess file in the root directory, and create a backup.
- Edit the .htaccess File: Open the .htaccess file with a text editor and add the following lines of code:
# Restrict access to wp-admin
AuthUserFile /dev/null
AuthGroupFile /dev/null
AuthName "Authorization Required"
AuthType Basic
<LIMIT GET POST>
order deny,allow
deny from all
allow from xx.xx.xx.xx
</LIMIT>
Replace xx.xx.xx.xx with your own IP address. This rule allows only your IP address to access the wp-admin directory. Others will be denied access.
- Save and Upload: Save the .htaccess file and upload it back to your server, replacing the existing file.
- Test the Restriction: Attempt to access the wp-admin directory from a different IP address. You should receive an “Authorization Required” message.
By implementing this .htaccess rule, you’ve successfully restricted access to the wp-admin directory, making it significantly harder for unauthorized users to access this critical area of your WordPress site. This is a fundamental step in fortifying your site’s security.
In the next section, we’ll discuss how to block malicious bots using .htaccess rules, an effective measure to maintain your website’s performance and security.
VII: Blocking Malicious Bots with .htaccess in WordPress
Welcome to the seventh article in our series on WordPress .htaccess security tips. In this installment, we’ll focus on blocking malicious bots using .htaccess rules. Malicious bots can significantly impact your website’s performance and security, and preventing them from accessing your site is essential.
The Threat of Malicious Bots
Malicious bots are automated programs that crawl websites with harmful intentions. They can overwhelm your site, consume bandwidth, and potentially carry out various malicious activities, such as:
- Scraping Content: Bots can scrape and steal your website’s content, including text, images, and data.
- Launching DDoS Attacks: Some bots are used in distributed denial of service (DDoS) attacks, causing your site to become unreachable.
- Spamming and Phishing: Bots can flood your site with spam comments, form submissions, and phishing attempts.
- Data Mining: Malicious bots can mine your site for sensitive information, such as email addresses and user data.
Blocking Malicious Bots via .htaccess
Here’s how you can block malicious bots using the .htaccess file in WordPress:
- Access Your .htaccess File: Connect to your server, locate the .htaccess file in the root directory, and create a backup.
- Edit the .htaccess File: Open the .htaccess file with a text editor and add the following lines of code:
# Block malicious bots
SetEnvIfNoCase User-Agent "BannedBot" bad_bot
SetEnvIfNoCase User-Agent "EvilBot" bad_bot
Order Allow,Deny
Allow from all
Deny from env=bad_bot
Replace “BannedBot” and “EvilBot” with the user-agent strings of the malicious bots you want to block. You can add as many bot user-agents as needed.
- Save and Upload: Save the .htaccess file and upload it back to your server, replacing the existing file.
- Test the Bot Blocking: You can test the bot blocking by configuring your own user-agent string as “BannedBot” and attempting to access your site. You should be denied access.
By implementing this .htaccess rule, you’ve successfully blocked malicious bots from accessing your WordPress site. This helps maintain your website’s performance and security.
In the next section, we’ll discuss how to prevent SQL injection attacks using .htaccess, a critical measure to keep your WordPress database secure.
VIII. Preventing SQL Injection with .htaccess in WordPress
In the eighth article of our WordPress .htaccess security tips series, we’ll focus on preventing SQL injection attacks using .htaccess. SQL injection is a common attack vector that can compromise your website’s database and lead to serious security vulnerabilities.
Understanding SQL Injection
SQL injection occurs when an attacker manipulates user inputs on a website to execute malicious SQL queries. If successful, this can lead to unauthorized access to your database, data theft, and potential data loss. Preventing SQL injection is crucial for safeguarding your WordPress site.
Preventing SQL Injection via .htaccess
Here’s how you can prevent SQL injection attacks using the .htaccess file in WordPress:
- Access Your .htaccess File: Connect to your server, locate the .htaccess file in the root directory, and create a backup.
- Edit the .htaccess File: Open the .htaccess file with a text editor and add the following lines of code:
# Prevent SQL Injection
Options +FollowSymLinks
RewriteEngine On
RewriteCond %{QUERY_STRING} (\<|%3C).*script.*(\>|%3E) [NC,OR]
RewriteCond %{QUERY_STRING} GLOBALS(=|\[|\%[0-9A-Z]{0,2}) [OR]
RewriteCond %{QUERY_STRING} _REQUEST(=|\[|\%[0-9A-Z]{0,2})
RewriteRule ^(.*)$ index.php [F,L]
This .htaccess rule detects potentially malicious SQL injection attempts in the query string and prevents them from being executed.
- Save and Upload: Save the .htaccess file and upload it back to your server, replacing the existing file.
- Test the SQL Injection Prevention: You can test the prevention by trying to execute a SQL injection attack on your site. It should be blocked, and you should receive a “403 Forbidden” error.
By implementing this .htaccess rule, you’ve taken a significant step in preventing SQL injection attacks on your WordPress site, which helps keep your database and data secure.
In the next section, we’ll discuss how to implement HTTPS and redirect HTTP requests to the secure version of your site using .htaccess rules, which is essential for both SEO and user trust.
IX. Implementing HTTPS and Redirecting HTTP in WordPress Using .htaccess
In the ninth article of our WordPress .htaccess security tips series, we’ll explore the process of implementing HTTPS and redirecting HTTP requests to the secure version of your site using .htaccess rules. This is crucial for both SEO and user trust.
The Importance of HTTPS
HTTPS (Hypertext Transfer Protocol Secure) encrypts the data exchanged between a user’s browser and your website, ensuring that sensitive information remains confidential. In addition to security, HTTPS has become an important ranking factor for search engines like Google. Sites that use HTTPS are often favored in search results, providing a competitive advantage.
Implementing HTTPS and Redirecting HTTP via .htaccess
Here’s how you can implement HTTPS and redirect HTTP to the secure version of your site using .htaccess in WordPress:
- Access Your .htaccess File: Connect to your server, locate the .htaccess file in the root directory, and create a backup.
- Edit the .htaccess File: Open the .htaccess file with a text editor and add the following lines of code:
# Enable HTTPS and Redirect HTTP to HTTPS
RewriteEngine On
RewriteCond %{HTTPS} off
RewriteRule ^(.*)$ https://%{HTTP_HOST}%{REQUEST_URI} [L,R=301]
This .htaccess rule checks if HTTPS is off and redirects all HTTP requests to the corresponding HTTPS version.
- Save and Upload: Save the .htaccess file and upload it back to your server, replacing the existing file.
- Test the HTTPS Implementation: Visit your site using an HTTP URL. You should be automatically redirected to the HTTPS version.
By implementing this .htaccess rule, you’ve enabled HTTPS for your WordPress site and ensured that all traffic is redirected to the secure version. This not only enhances your site’s security but also improves SEO and user trust.
In the final section of our series, we’ll discuss the importance of regular backups and monitoring for your WordPress website’s security. Backups are a safety net, and monitoring helps you stay vigilant against potential threats.
X. Regular Backups and Monitoring for WordPress Security
In this tenth and final article of our WordPress .htaccess security tips series, we’ll discuss the importance of regular backups and monitoring for your website’s security. Backups serve as a safety net, and monitoring helps you stay vigilant against potential threats.
The Significance of Backups
Regular backups are your website’s insurance policy. They provide a way to recover your site and its data in the event of unexpected disasters, such as hacking, server failures, or human errors. Without backups, you risk losing valuable data and potentially harming your online presence.
Implementing Regular Backups
Setting up regular backups for your WordPress site is crucial. While it’s not directly related to .htaccess, it’s an essential part of your overall security strategy. Here’s how to implement backups:
- Choose a Backup Solution: There are various backup plugins and services available for WordPress. Popular options include UpdraftPlus, BackupBuddy, and Jetpack. Select one that suits your needs.
- Configure Backup Settings: Install and configure your chosen backup plugin or service. Set up automated backups to occur at regular intervals, ensuring that your website data is consistently protected.
- Verify Backup Integrity: After creating backups, verify their integrity by restoring them to a staging or test environment. This ensures that your backup solution is working correctly.
- Store Backups Securely: It’s important to store backups in a secure location, separate from your web server. This can be cloud storage, an external server, or a local device.
The Significance of Monitoring
Monitoring your website is like having a security guard for your online presence. It helps you identify potential threats, vulnerabilities, or unusual activities before they cause significant damage.
Implementing Monitoring
Implementing monitoring for your WordPress site requires using various tools and services. Here’s how you can get started:
- Security Plugins: Install a reputable security plugin that provides real-time monitoring, malware scanning, and alerts for suspicious activities. Plugins like Wordfence and Sucuri Security are popular choices. I suggest that you read our article on the Comprehensive WordPress Security Best Practices For 2024 to further you knowledge about securing your wordpress site.
- Google Search Console: Monitor your site’s performance and security through Google Search Console. It can alert you to issues that may affect your SEO and user experience.
- Uptime Monitoring: Use an uptime monitoring service to receive alerts if your site experiences downtime. This ensures that your website remains accessible to users.
- Traffic Analysis: Regularly review your website’s traffic to identify unusual patterns or an increase in malicious bot activity. Google Analytics can help with this.
By implementing both regular backups and monitoring, you create a robust safety net for your WordPress site. Backups provide recovery options, while monitoring helps you stay vigilant against potential threats and vulnerabilities.
Remember that website security is an ongoing process. Staying informed about the latest security threats, regularly updating your WordPress core, themes, and plugins, and following best practices are crucial for maintaining a secure online presence.
With the knowledge gained from this series of sections and your commitment to security, you can significantly enhance the protection of your WordPress website.
This concludes our series on WordPress .htaccess security tips. We hope that these article has provided you with valuable insights and practical guidance for securing your WordPress site effectively.